5050 4Pin LED Strip Connector Kit with 2 Way RGB Splitter Cable, 6.6ft RGB Extension Cable, Strip to RGB Controller Jumper, LED strip to strip Jumper, L Shape Connectors, Gapless Connectors
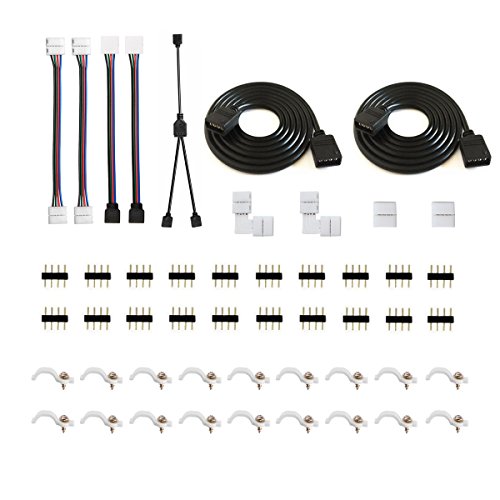
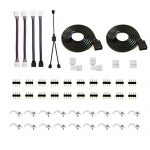
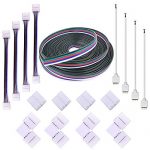
This 5050 4 Pin LED strip light connnector kit provides the most parts you need for a DIY LED strip light project.
●2 way RGB splitter cable is for connecting 2 pcs of 10mm wide SMD 5050 3528 color changing RGB LED strip lights to a single controller.
●The 6.6ft RGB extension cable is used for connecting between IR RF RGB Controller and 5050 3528 RGB LED strips and extending your LED strips to the ideal location you want.
●The strip to RGB controller jumper for connecting RGB 5050 LED rope light and segments to LED RGB controller ●The LED strip jumper connector with wire is used for connecting RGB 5050 flexible LED light strips and strip segments around corner.
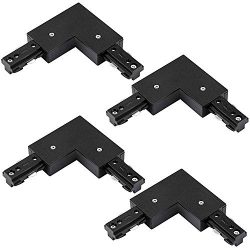
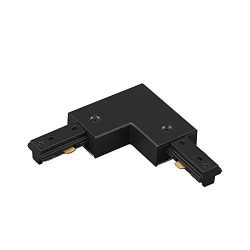
●The l shaped led strip connector is used when you need to spring your light strips around sharp 90 degree corner.
●The gapless led strip connector helps connect two RGB 5050 flexible LED tape light and strip segments easily and quickly without soldering.
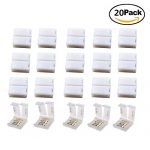
●The LED strip clip is easy to fix the light strip by one screw, and take down the LED strip light from the other end freely when replace or maintain it.
●4 Pin male connector is widely used as connector between led strips and remote controller Warm Reminder:
If you meet any problems during installation, please contact us by email on Amzon of “Ask a question” button, you will get a reply within 24 hours.
Package Includes:
1 x 2 way RGB splitter cable
2 x 6.6ft RGB extension cable
2 x strip to RGB controller jumper
2 x LED strip to strip jumper with wire
2 x L shape connectors
2 x Gapless connectors
20 x LED Strip Clips
20 x 4 Pin Male Connector
Product Features
- ★WARRANTY: 24 months warranty for iCreating 5050 4Pin LED strip connector kit, 90 days money back guarantee for any reason, 24 hours online customer service
- ★PACKAGE INCLUDES: 1x 2 way RGB splitter cable, 2x 6.6ft RGB extension cable, 2x strip to RGB controller jumper, 2x LED strip to strip jumper with wire, 2x L shape connectors, 2x gapless connectors, 20x LED Strip Clips, 20x 4 Pin Male Connector
- ★APPLICATION: 10mm 4 wire LED light strip connector kit for waterproof and non-waterproof 5050 RGB Color Changing LED strip lights
- ★OPERATING CONDITION: These LED tape connectors support 0-4A current and 0-24V voltage input, heat resistance level from -20 ~ 100 degree
- ★NOTE: When connecting waterproof LED strip lights with these LED strip connectors, silicon gel on the surface of soldering area must be peeled off


Does not work on waterproof LED strip Seller noted; ” â NOTE: When connecting waterproof LED strip lights with these LED strip connectors, silicon gel on the surface of soldering area must be peeled off “Not exactly, the silicon on waterproof LED strips are molded into place so you can’t just peel them off. You can try to cut them off but the copper film is so thin the ends will not work with even the lightest of error cutting or scraping the silicon off. There is another connector I just found that solves the problem for…
Keep searching No connectors for the wire, so I’m assuming you solder or wirenut or crimp. The ones with 2 ends and wire between them are the only useful and reliable piece I found in it. I cut them in half and uses one on each end of a section of rgb lights that I don’t want light at (ie – around stove to the next cabinet)There I crimped to 4 conductor wire as apposed to this flat wire but it would have worked there instead.The corner fittings I had trouble with 2 of 4 not making good contact. I…
These pigtails work great!!! These pigtail connectors work great for LED strip cabinet Installations. I have installed vertical runs of LED strip on each side of each cabinet, on the rear side of the cabinet trim. I use these pigtails to connect the vertical LED strip and then feed the pigtail end up thru a drilled hole to the top of the cabinet. I connect each pigtail to a terminal strip, I found on Amazon, that I have mounted on the top of the cabinet (out of sight) and then connect the terminal strips together using…